 Español
 Italiano
 Français
How do I delete my Teaming Group?
To delete your Teaming Group, follow the steps below:
1. Log in to your Teaming account by clicking here.
2. Visit your Teaming Group. It is important that you follow these steps in this order (first log into your Teaming account and then visit the Group), because the option we are talking about in the next step is only visible to you, as Teaming Manager of the Group. So only if you log in first, the system will be able to identify you as the Teaming Manager.
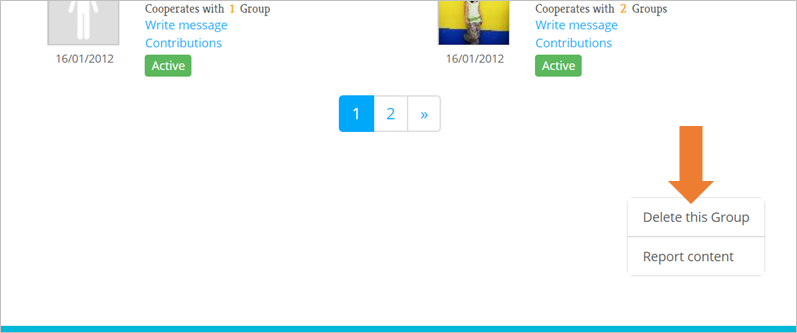
3. You will see the option “Delete this Group” at the bottom, just below the Teamers. Here is an example:
You can also find this option in your Teaming profile, where you will see the Group you lead and right next to it (or below, if you are visiting Teaming using your cell phone), you will see the same button.
4. The system will ask you for the reason why you are asking to delete your Group, but it is optional. If you want, you can answer it but if not, you can continue anyway. However, since it helps us to improve so if you give us your reasons and we would be very grateful.
5. Click on the “Delete my Group” button. The moment you click on it, the Group will pause – that is, anyone will be able to join your Group and your Teamers won’t be charged anymore- and your request to delete your Group will be sent.
Once you have done these steps, Teaming will have received your request, but (important!) it will not be deleted yet. And you’re probably wondering, when will it be deleted then?
Please, note:
- To delete your Group, it mustn’t have funds left to transfer. It means, if you have raised funds, but have not yet sent them to the social cause, we need you to do so. Click here to find out how.
- Once you don’t have funds pending to be transferred, you don’t have to worry about anything. The Teaming team eliminates the Groups that have requested it regularly.
What if I change my mind after requesting to delete my Group?
If you change your mind, you can reactivate the Group, as long as it has not yet been deleted. To reactivate it, follow the same steps as we have described before to delete it. In the same place where you saw the option “Delete this Group” previously, you will now see the option “Reactivate this Group”. Click on this option and confirm.